Are you conversant with Sniply? The premise behind the site is innovative.
You add your Call to Action and link to someone else’s article in your business niche, and Sniply gives you a new link. When the new link is clicked, you and the website that wrote the article both get page views!
Confused?
No problem, In this Sniply review, you will learn how you can use Sniply to increase page views, social shares, and subscribers.
Let’s get started right away!

What is Sniply?
Sniply is a social media marketing tool that allows people to add custom messages to any web page they post. Users can embed call-to-action into every piece of content they share, including links to articles from top websites such as Forbes, Mashable, TechCrunch, etc.
Anyone who clicks on a Sniply link will see the original content with the call-to-action displayed inside, allowing businesses to convert social media followers into users and customers.
I like how easy Sniply is to use, this is a tool that can be used to drive customers and conversion for your business.
The interface has been pleasing thus far. I didn’t have to read tons of material to get started and you get to see live updates as you edit the call to action and links. Sniply has allowed us to share meaningful content with our audiences without consistently pushing our content.
Features and Benefits of Sniply
Types of Sniply
- Button Snip: Attach an eye-catching button that visitors can click on to visit your page
- Form Snip: Attach an email capture form so visitors can signup for your mailing list
- Text Snip: Attach a hyperlinked text that visitors can click on to visit your page
- Image Snip: Attach a custom banner image that visitors can click on to visit your page
- Hidden Snip: Hide the Sniply bar entirely and still make use of Sniply’s powerful functionality
Customizations
- Themes: Customize your brand and call-to-action with a collection of beautiful themes
- Custom Colors: Customize the look and feel of your snips with your own brand colors
- Custom Positioning: Customize the position of where your snip shows up on page
- Custom Domain: Customize the way your links appear by connecting your own custom domain
- Custom Shortlink: Customize the way your Sniply links appear by writing your own short link
- Remove Sniply Branding: Reinforce your own branding by removing the Sniply logo from your snips
Data Gathering
- Analytics: Track and analyze all your clicks and conversions through your snips
- Conversion Pixel: Track specific actions taken on your website by planting a conversion pixel
- A/B Testing: Experiment with multiple variations to optimize for higher conversion rates
Connect Apps
- Integrations: Connect with Hootsuite, Buffer, Sendible, Mailchimp, Zapier, and more
- Extensions: Install Sniply on your browsers such as Chrome, Firefox, Safari, and Explorer
- API: Build your own custom workflow using our comprehensive API
Custom Code
- Retargeting Pixel: Attach retargeting pixels to your snips to build custom audiences for remarketing
- Custom Tracking: Integrate with custom analytics software such as Google Analytics or KISSmetrics
- Custom CSS: Write your own CSS to fully customize the look and feel of your snips
- Custom Scripts: Attach code snippets and scripts to your snips for custom functionality
Support
- Email Support: 24/7 email support from our team for all matters of troubleshooting
- Phone Support: One-on-one phone support for everything from setup to strategy
- Setup Assistance: Full setup including branding, team management, integrations, and more
- Invoicing: Custom invoicing based on the unique requirements of your organization
CLICK HERE TO START ANY PLAN FOR 14 DAYS FREE!
Sniply Pricing
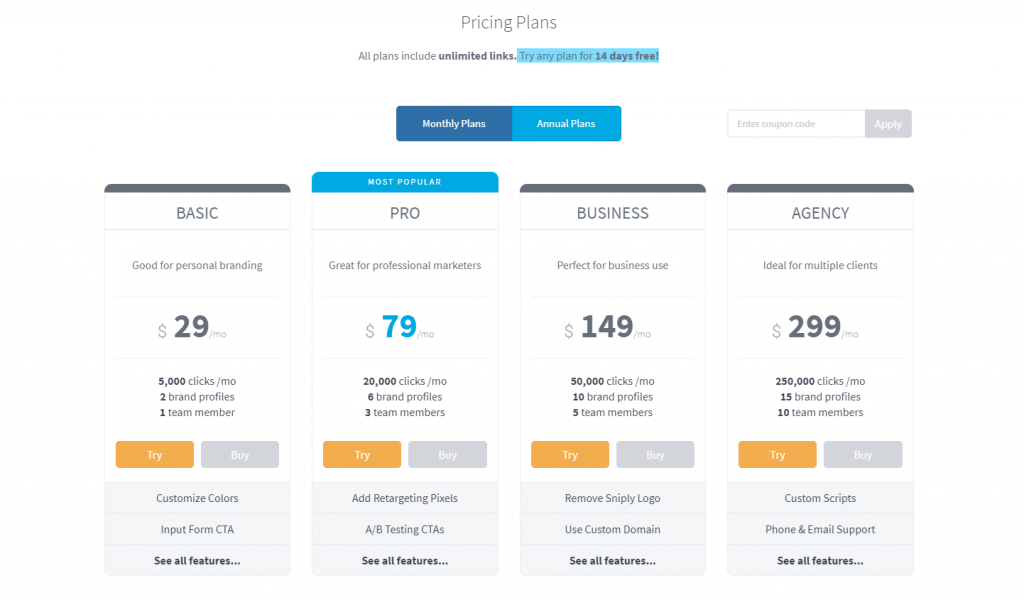
If you are not boxed up, then register to try Sniply for free or… CLICK HERE TO START ANY PLAN FOR 14 DAYS FREE!
Getting Started With Sniply
What is a Sniply Type?
Get 50% Discount to Master ALL Aspects of Digital Marketing That Can Earn You $2,500 - $5,000 a month (Even if you are a complete beginner!)
Our students that intentionally implement what they learn from our digital marketing course make back the entire course fee within a single month or more after completing our course because our course gives them many income generating options with unlimited earning potential with no age or location barrier. The best part is no technical skills are required.
An opportunity to change your lifestyle and make money working from anywhere in the world. The results our students get from our digital marketing course prove this could be applied to any market or country and that it is designed for any skill level and work background.
*By signing up, you agree to our privacy policy and terms of service.
Different types of Sniply behave differently and serve different purposes! For example, a Button Snip is an eye-catching button your visitors can click on to visit your page. A Form Snip is an email capture form your visitors can fill out to signup for your newsletter.
- Button Snip: An eye-catching button that visitors can click on to visit your page
- Form Snip: An email capture form for visitors to sign up for your newsletter
- Text Snip: A message with hyperlinked text that visitors can click on to your page
- Image Snip: A custom banner image that visitors can click on to visit your page
- Hidden Snip: Visually hide the Sniply bar while still making use of other functionality
How do I create a Button Snip?
This guide will teach you how to create a Button Snip.
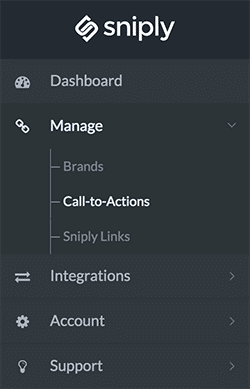
Step 1: Go to the Call-to-Action section in your Sniply Dashboard
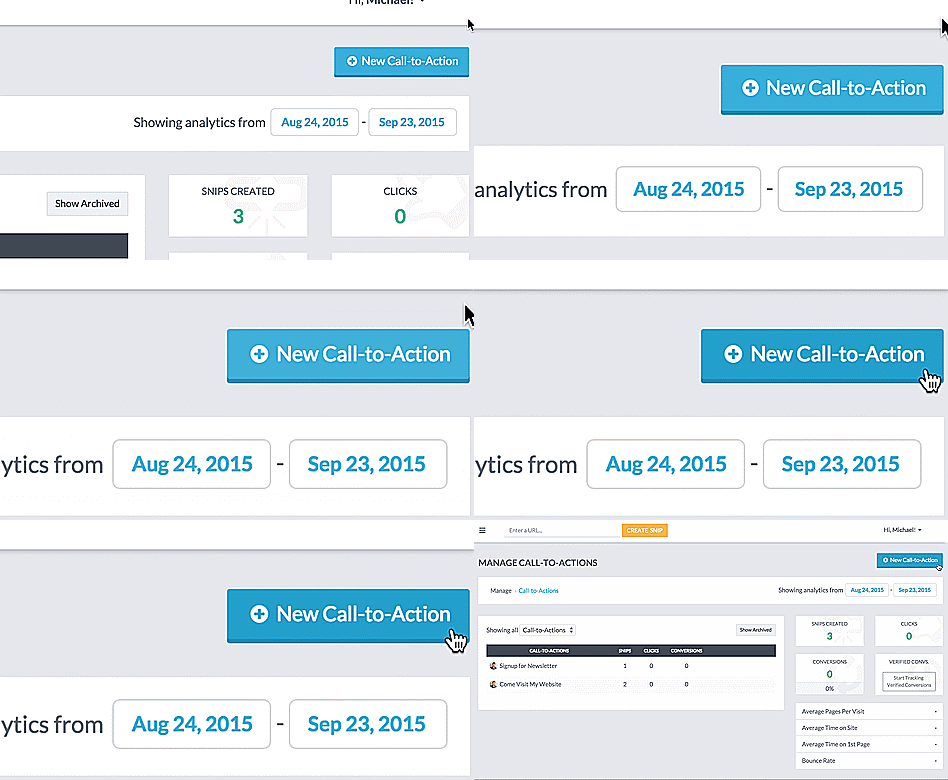
Step 2: Click on the Add New Call-to-Action in the right top corner
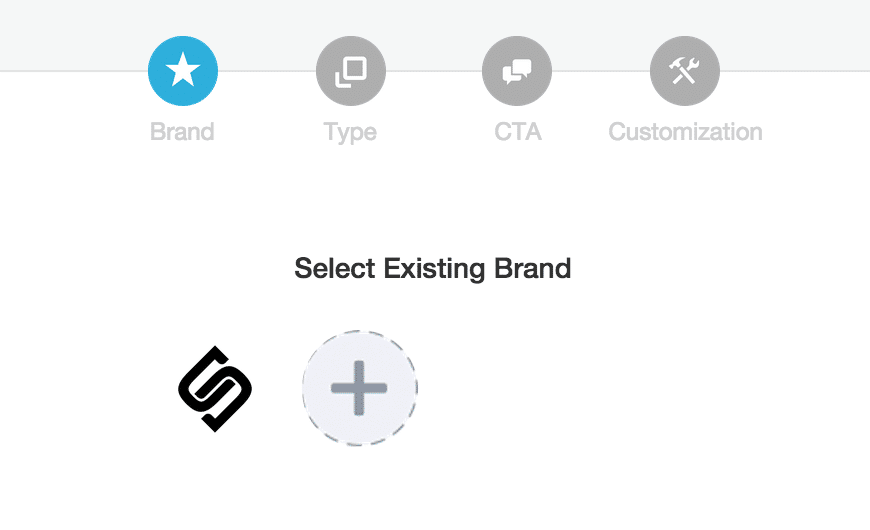
Step 3: Select an existing brand or Create a New Brand
Step 4: Select the Button type to create a Button Snip
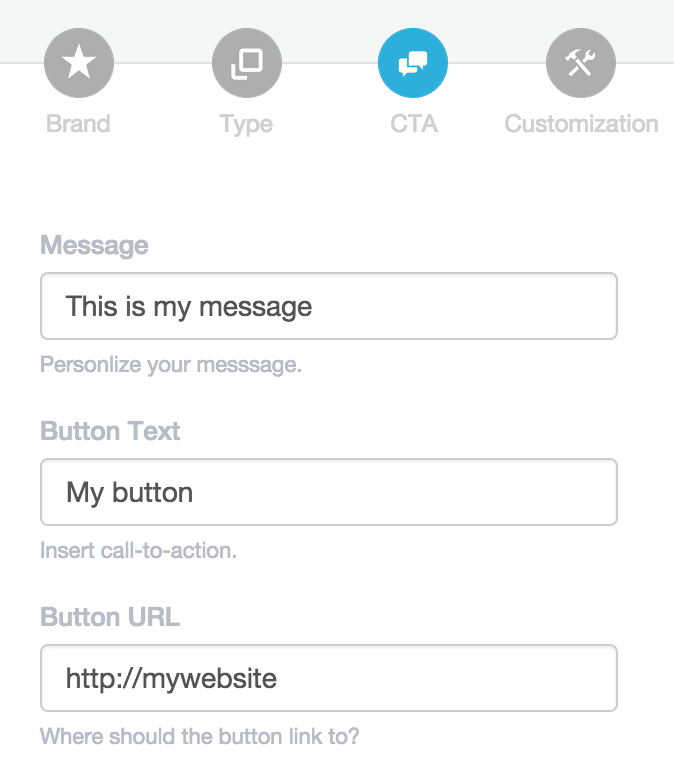
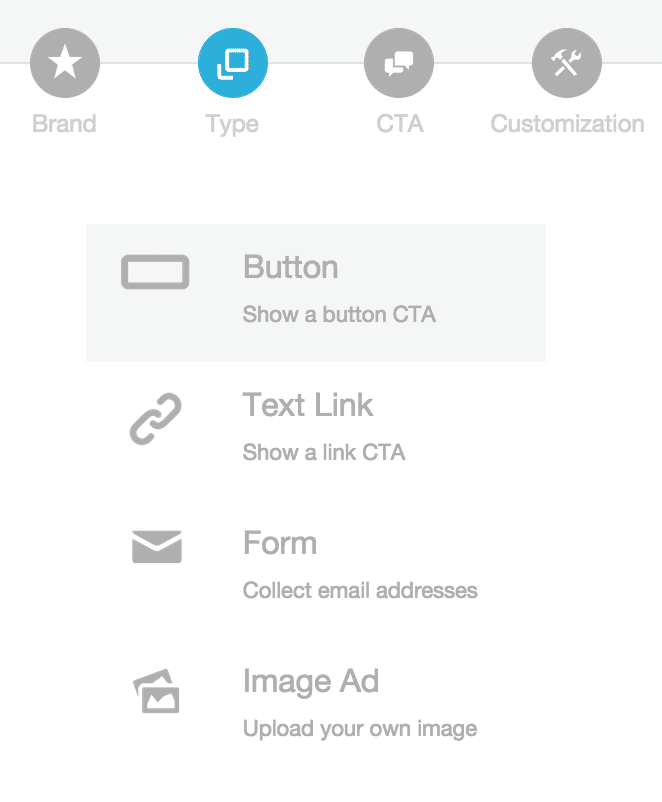 Step 5: Add your message and call to action. The button URL is where visitors will go when they click your button
Step 6: Preview your snip and make sure it looks good (you can also customize the look and feel of your snip)

Done!
How do I create a Form Snip?
This guide will teach you how to create a form snip.
Step 1: Go to the Call-to-Action section in your Sniply Dashboard

Step 2: Click on the Add New Call-to-Action in the right top corner

Step 3: Select an existing brand or Create a New Brand

Step 4: Select the Form Type to create a Form Snip
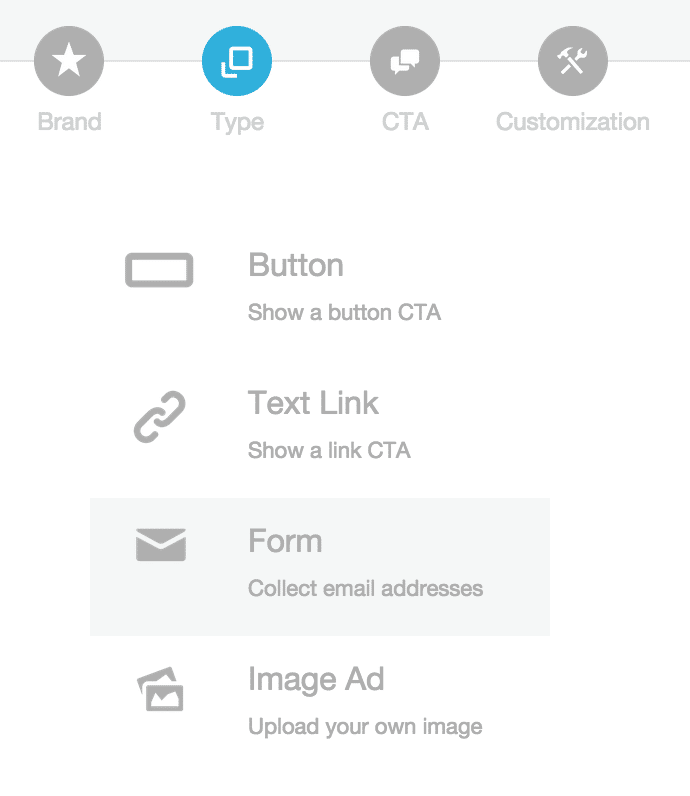
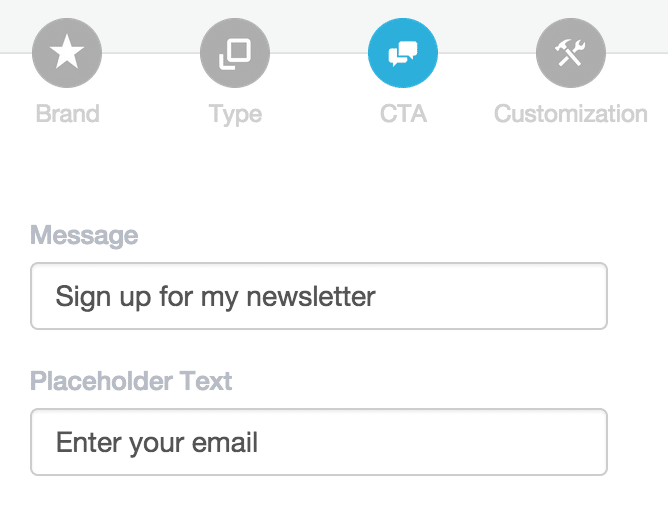
Step 5: Add your message and placeholder text for the form field. The placeholder text will disappear when a visitor types in the field.
Step 6: Preview your snip and make sure it looks good (You can also customize the look and feel of your snip}

Step 7: You’re done creating your Form Snip.
There are two ways to export the form submissions:
- Manually: you can download a table of form submissions.
- Hooked up through an Integration: use Zapier to hook up your form submissions to MailChimp, Aweber, Hubspot, and more!.
Done!
How do I create an Image Snip?
This guide will teach you how to create an Image Snip.
Step 1: Go to the Call-to-Action section in your Sniply Dashboard

Step 2: Click on the Add New Call-to-Action in the right top corner

Step 3: Select an existing brand or Create a New Brand

Step 4: Select the Image type to create an Image Snip
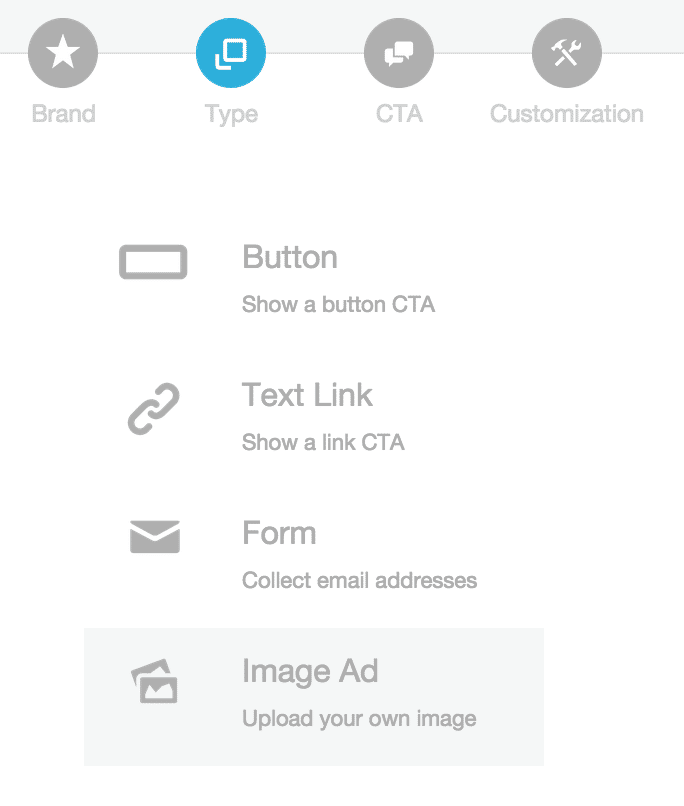
Step 5: Upload an image and determine where it links to. Clicking on your image will lead visitors to your destination URL
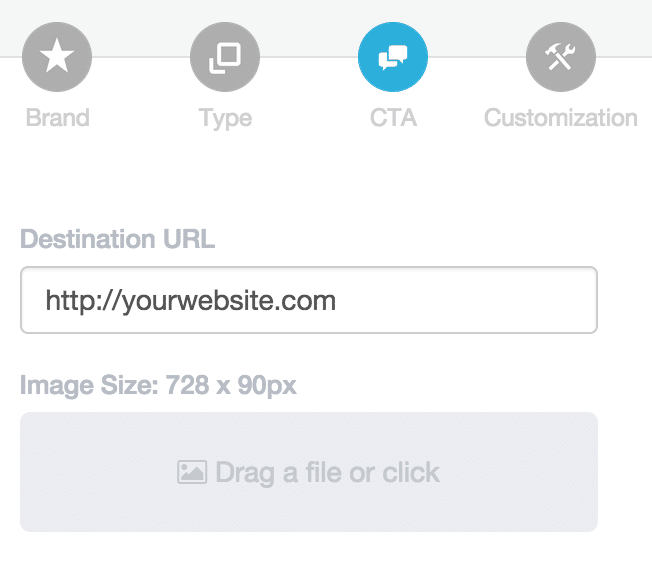
Step 6: Preview your snip and make sure it looks good. You can customize the position of where this shows up on the page.

Done!
How do I create a Hidden Snip?
This guide will teach you how to create a Hidden Snip.
Step 1: Go to the Call-to-Action section in your Sniply Dashboard

Step 2: Click on the Add New Call-to-Action in the right top corner

Step 3: Select an existing brand or Create a New Brand

Step 4: Select the Hidden type to create a Hidden Snip
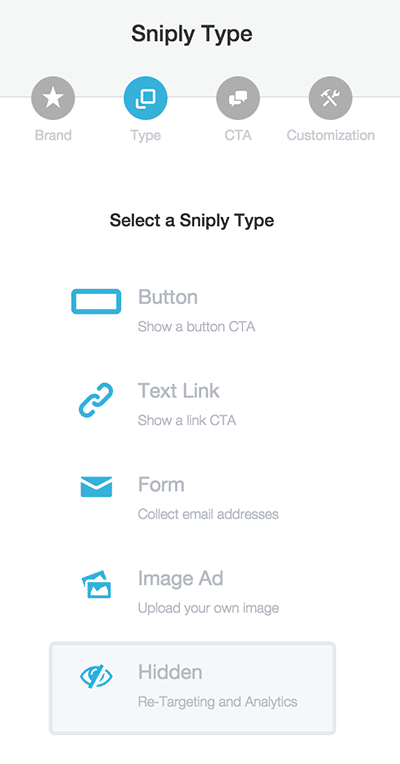 Done!
Done!
How do I create a Text Snip?
This guide will teach you how to create a Text Snip.
Step 1: Go to the Call-to-Action section in your Sniply Dashboard

Step 2: Click on the Add New Call-to-Action in the right top corner

Step 3: Select an existing brand or Create a New Brand

Step 4: Select the Button type to create a Button Snip
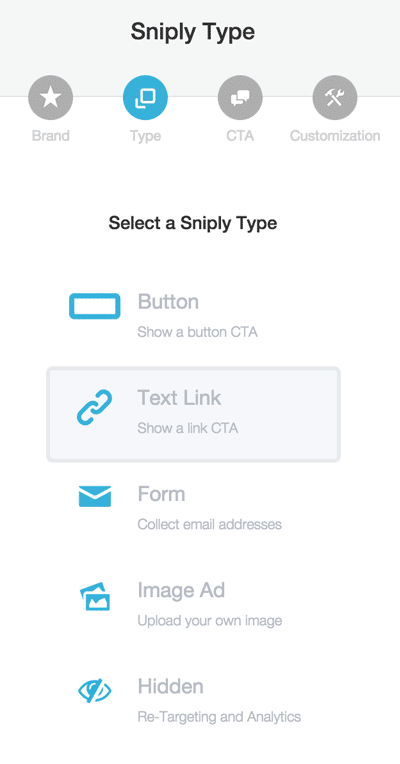
Step 5: Add your message and call-to-action. Link Url is where visitors will go when they click your hyperlinked text.
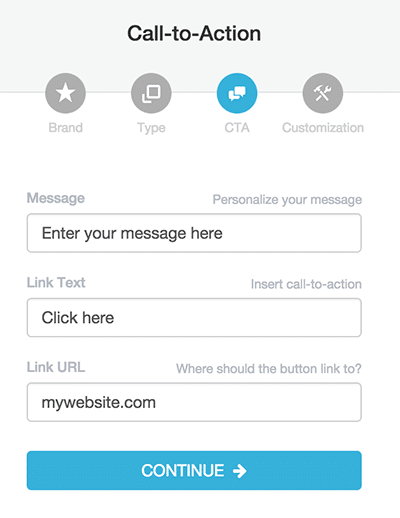
Step 6: Preview your snip and make sure it looks good. You can also customize the look and feel of your snip.

Done!
How do I snip within Buffer, Hootsuite, Facebook, Twitter, etc?
This guide will teach you how to snip anywhere create snips using the AutoSnip feature.
Step 1: Install the Sniply Extension
You can integrate with Buffer/Hootsuite/Facebook/Twitter/etc through Sniply browser extensions, so the first thing you need to do is install Sniply on your browser:
Once installed, the extension will automatically integrate with Buffer/Hootsuite/Facebook/Twitter/etc. If installed properly, you should see a Sniply icon in the extensions bar of your browser.

Step 2: Login to Buffer/Hootsuite/Facebook/Twitter/etc
When you log in to Buffer/Hootsuite/Facebook/Twitter/etc with Sniply installed on your browser, you should see a new Sniply icon in the message interface.

 Step 3: Create Sniply links using Buffer/Hootsuite/Facebook/Twitter/etc
You can use this Sniply icon to create Sniply links! Just click on it and it will open up a Sniply creator directly within. Buffer/Hootsuite/Facebook/Twitter/etc. Simply select the call-to-action you’d like to use and include the domain you’d like to snip, and the new Sniply link will be added to your post!
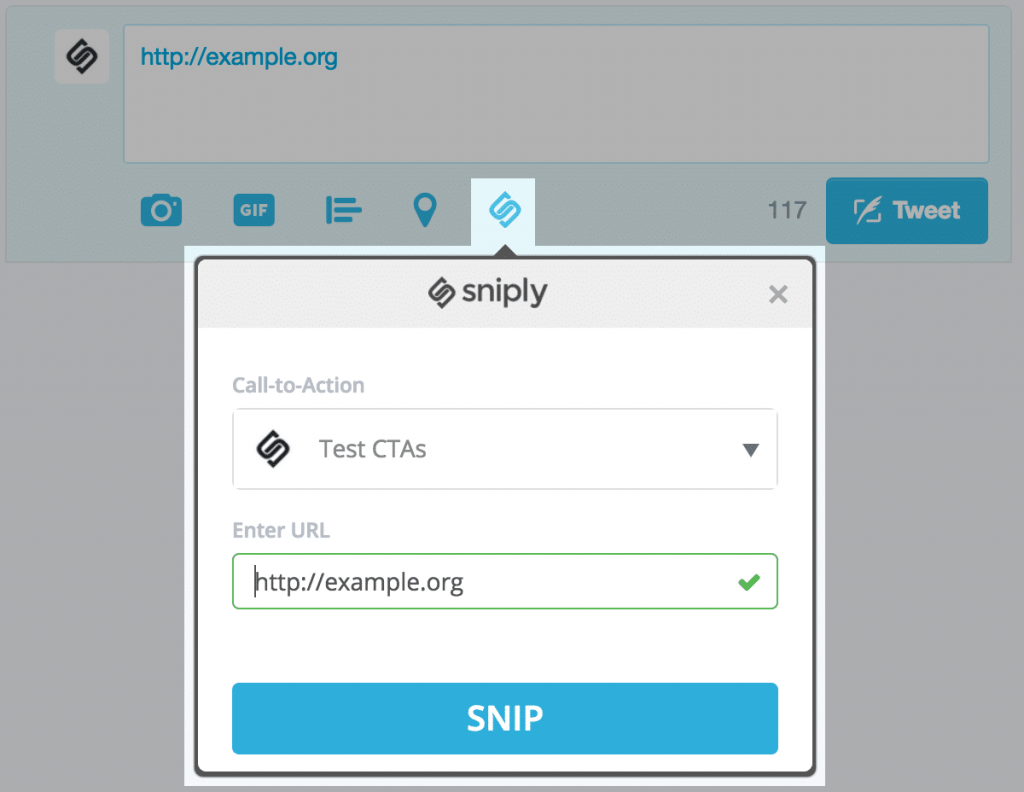
Bonus Tip: Save time with the Auto-Snip feature!
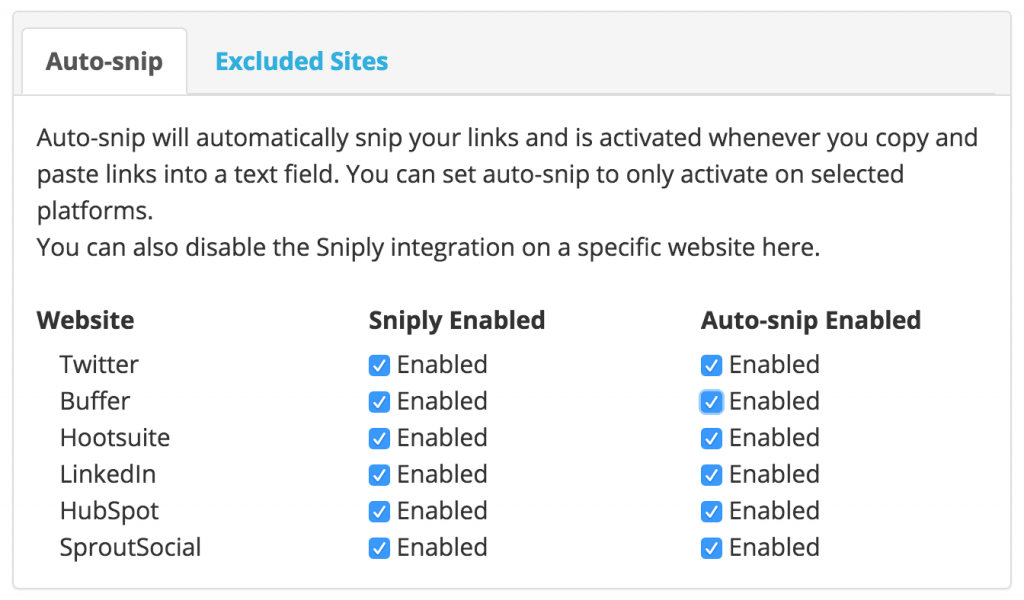
Simply paste the link into the text box in Buffer/Hootsuite/Facebook/Twitter/etc and Sniply will automatically snip the link using your most previously used Call-to-Action! You can toggle this feature on or off by right-clicking on the Sniply icon in your browser and selecting Options.

Done!
How do I create snips using Chrome/Firefox plugins?
This guide will teach you how to snip anywhere using Chrome/Firefox plugins
Step 1: Install the Sniply Extension
We integrate with Chrome/Firefox through our browser extensions, so the first thing you need to do is install Sniply on your browser:
Once installed, you should see a Sniply icon in the extensions bar of your Chrome/Firefox browser.

Step 2: Click the Sniply icon to snip the current page
When you click the Sniply icon in your extensions bar, it will launch the Sniply Creator, allowing you snip the page you’re currently on. You can select from a list of your call-to-actions.
![]()
Step 3: Share the Sniply link!
Once you’ve created the Sniply link, you can copy and paste the link to share it anywhere you’d like! You can also use the built-in options to share directly to Facebook, Twitter, LinkedIn, Google+, Hootsuite, or Buffer.
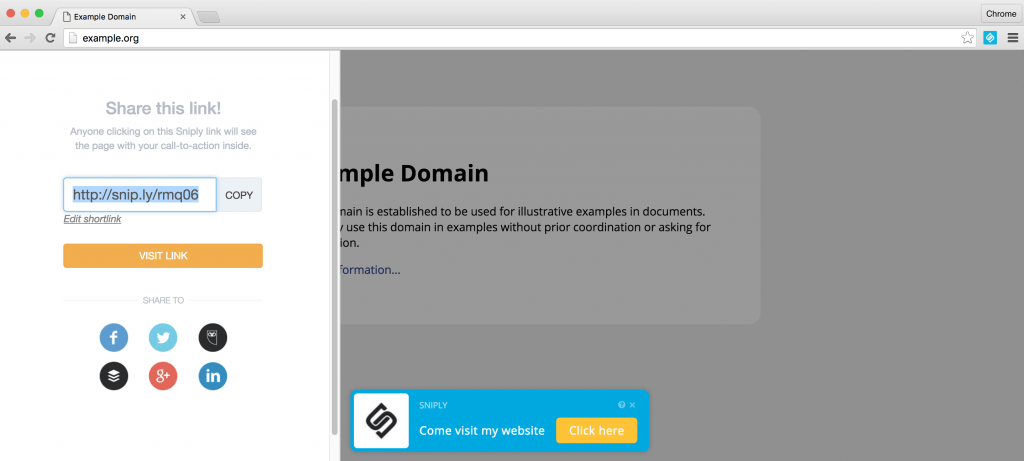
Done! You just learned how to snip anywhere using our Chrome/Firefox plugin.
How do I create snips using Safari, Explorer, or other browsers?
This guide will teach you how to snip anywhere using Chrome/Firefox plugins.
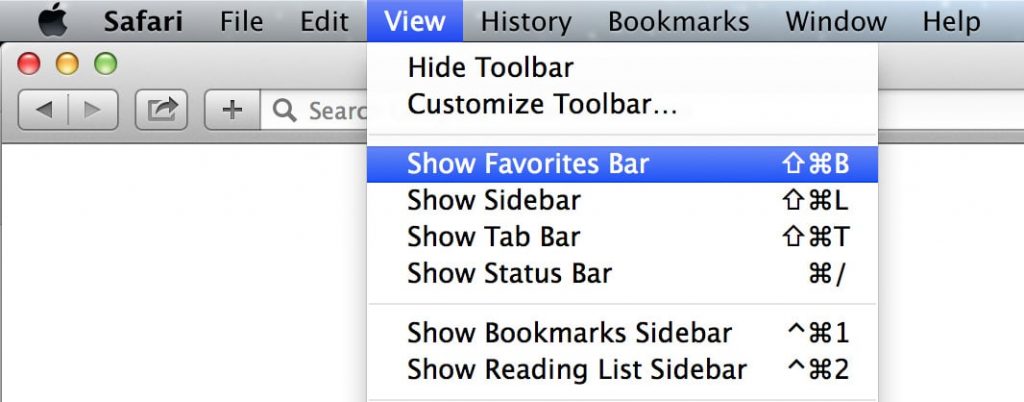
Step 1: Open your browser and navigate to View > Show Favorites/Bookmarks Bar. All browsers should offer an option to show or hide the bookmarks bar.
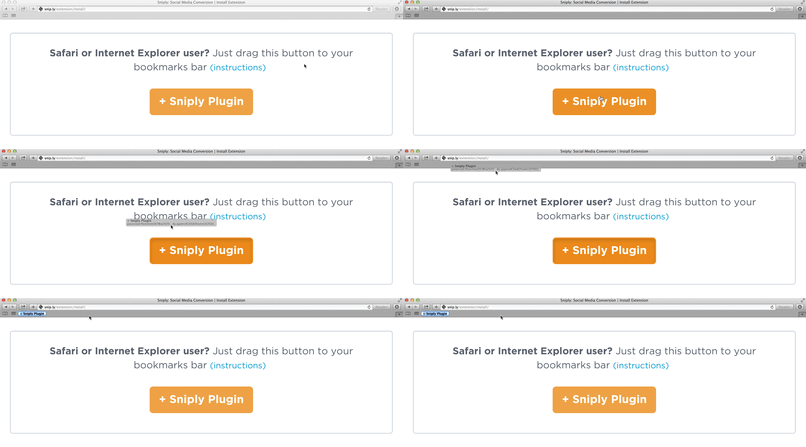
Step 2: Visit http://snip.ly/extension/install/ and drag the plugin to your bar. Do not click on the button—simply drag the button into your bookmarks bar.
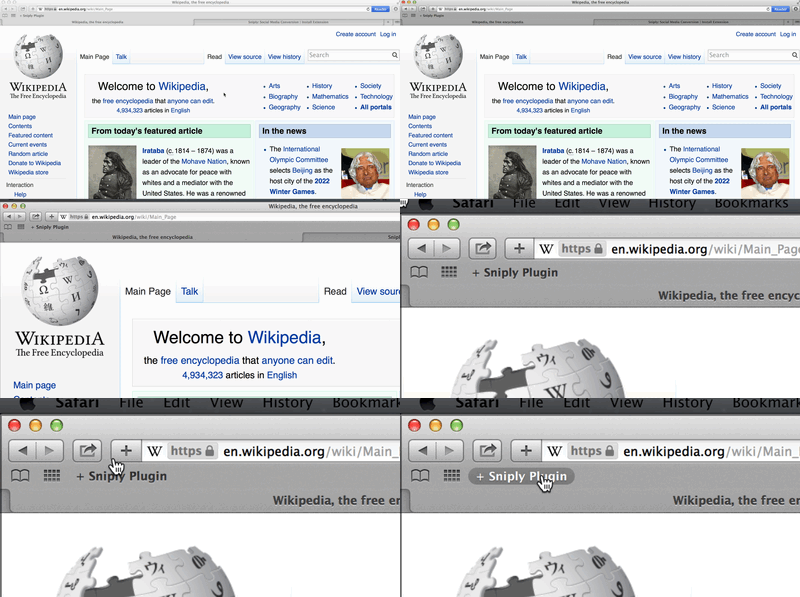
Step 3: Navigate to the page you wish to snip and click on the bookmarklet. Clicking on the sniply bookmarklet will open up the snip creator.
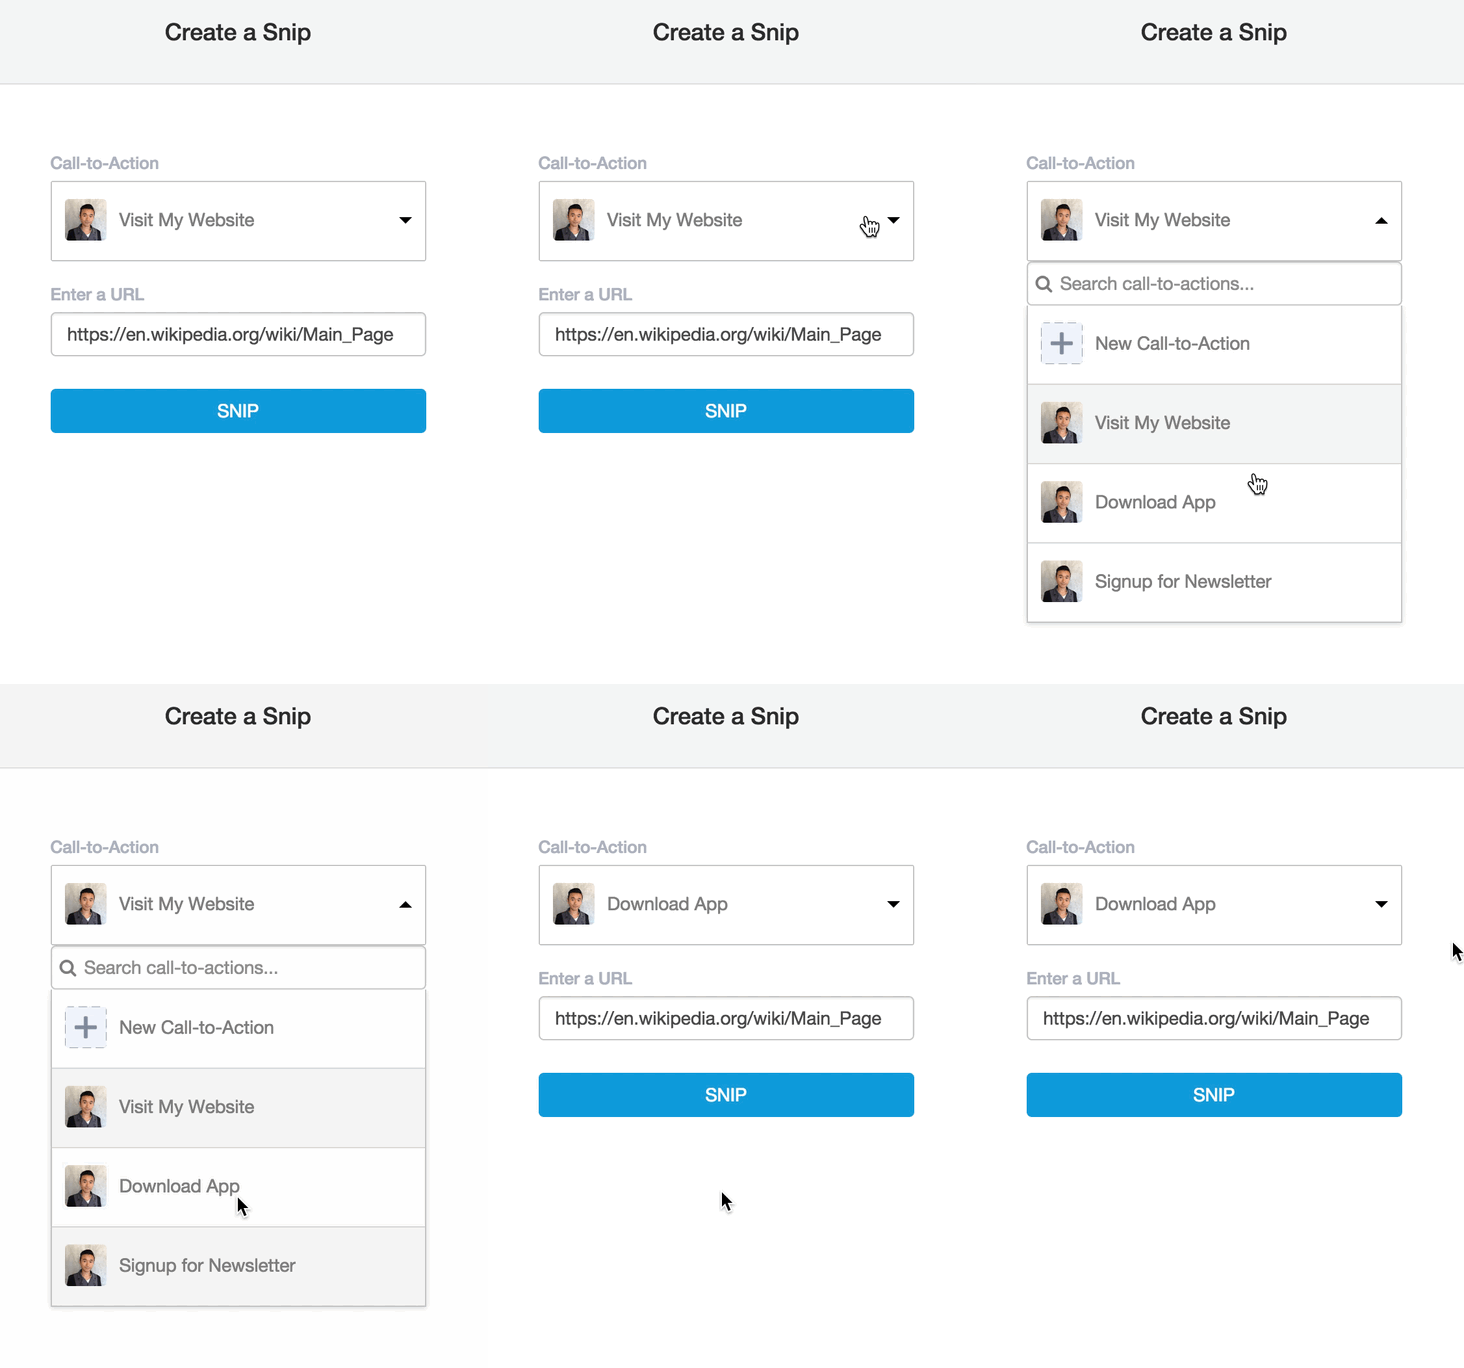
Step 3: Choose a Call-to-Action or create a Call-to-Action. Call-to-actions contain your message and action link.
Step 4: Share the sniply link with everyone! Snips can be shared on Facebook, Twitter, newsletters, and more.
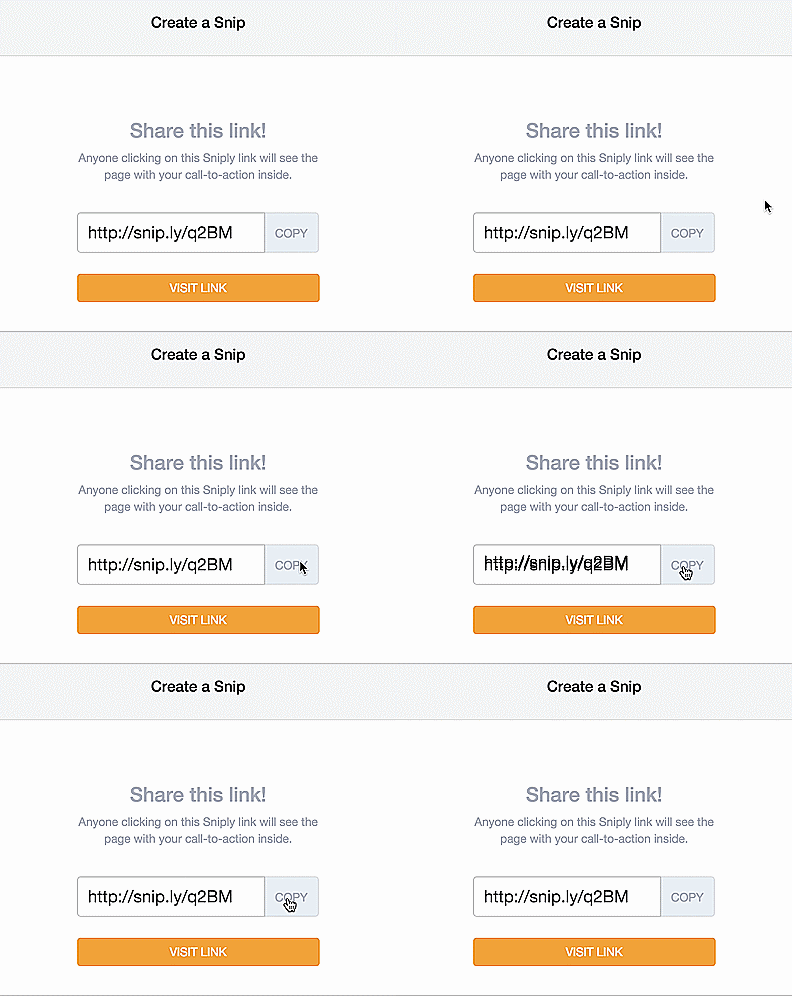
Done! You just learned how to snip anywhere using our Safari/Explorer plugin.
How do I create snips using my custom domain?
Using a New Domain
This guide will teach you how to snip using your own domain (snip.ly/abc -> mysite.co/abc)
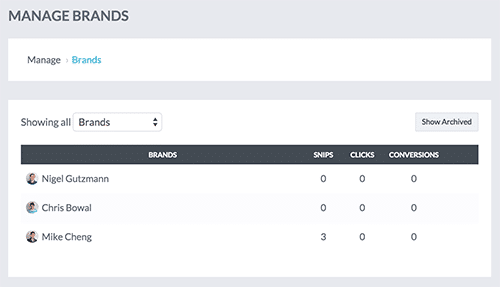
Step 1: Go to the Brands section in your Sniply Dashboard

Step 2: Click on the Brand you wish to connect your domain to
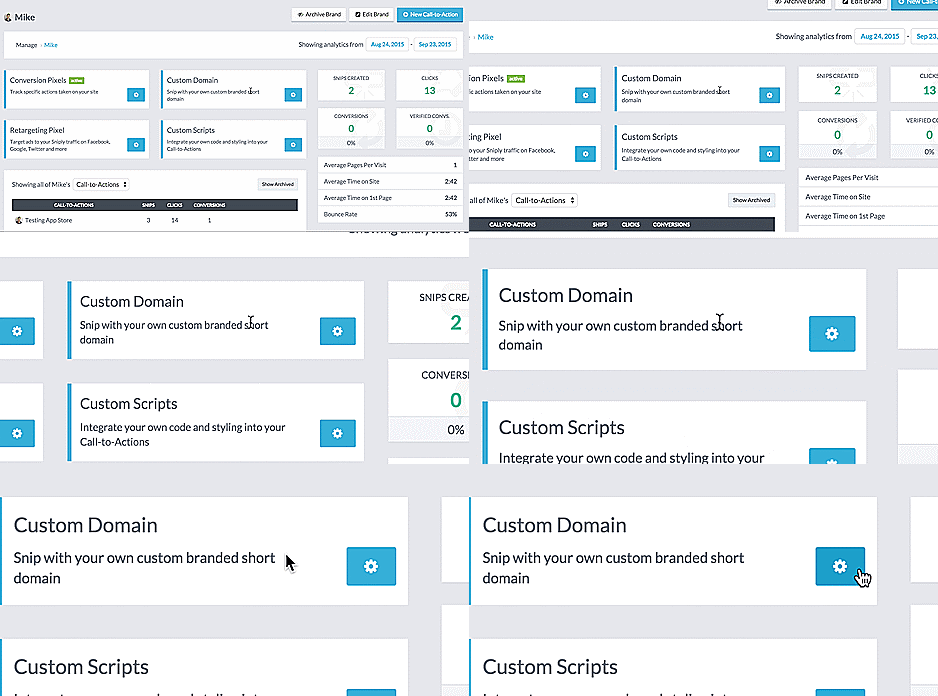
Step 3: Find the Custom Domain tab and click on the Gear Icon
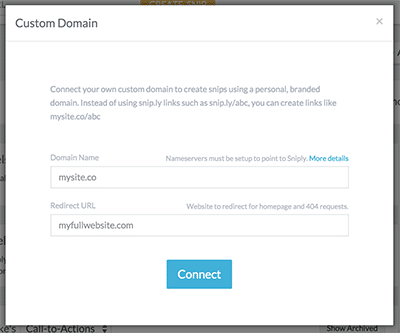
Step 4: Simply type in your domain name and redirect URL
Step 5: Log in to your domain manager (or buy a new domain) and set up your nameservers
- Buy a domain (if you already have one, you can skip step 2). GoDaddy, Namecheap, etc. are all popular options.
- Redirect your nameservers to Sniply:
nameserver #1 = dns1.stabletransit.com
nameserver #2 = dns2.stabletransit.com
Here are instructions for GoDaddy and Namecheap. Questions?
Done! You can now create snips using your own domain (snip.ly/abc -> mysite.co/abc)
Using Your Website’s Domain
If you don’t want to buy a new domain, you can also use your existing domain, but you will need to create a subdomain. For example, if your website is mysite.com, you can use Sniply with a domain like sharedby.mysite.com (Sniply links will look like sharedby.mysite.com/abcd).
In summary
Sniply is a fun way to let people know about your business without posting your content all the time and it’s easy to use.
The fact that you can customize the message and call to action button on each post is great. It gives you the flexibility to create something people will interact with. You can also track successes as well.
CLICK HERE TO START ANY PLAN FOR 14 DAYS FREE!
More reviews:
- SUMO Review | How to Use Sumo to Drive More Traffic, Followers, and Customers
- Use Proof Review – A Great Social Proof Marketing Tool To Sell More Online
- GetResponse Review | One of the Cheapest Email Marketing Solutions
- Instapage Review | A Powerful Landing Page Builder for Online Marketing
- SERPWatcher Review | An SEO Tool For Tracking Keyword Performance
- Stencil Review | Popular Graphic Design Tool for Social Media Marketing
- 5 Stunning Social Media Marketing Tips To Grow Your Business

