A good Mailchimp setup comes down to four early choices: how you store contacts, how you label them, how people sign up and what you send first. Get those right in your first hour and your list stays cheap, clean and trusted. Get them wrong and you pay for duplicates, land in spam and misread your results.
Key Takeaways
- The free plan is small by design. Mailchimp’s pricing page caps its Free plan at 250 contacts and 500 sends a month, with no automation flows, so plan your upgrade point early.
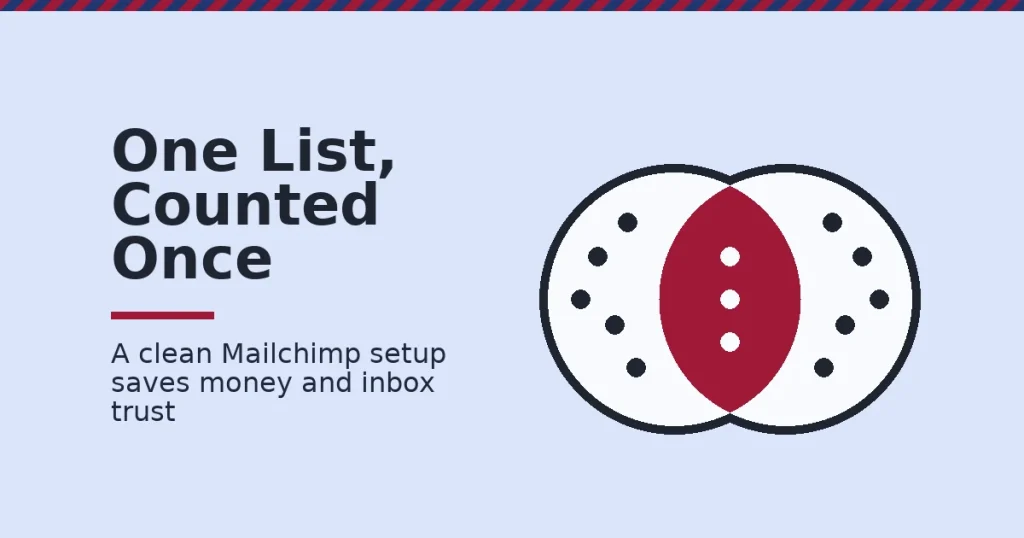
- Duplicates cost money. Mailchimp’s help centre says audiences do not share contact data, so a Mailchimp setup with one person in two audiences counts them as two contacts.
- Double opt-in is not automatic. Mailchimp’s documentation says double opt-in is off by default for most accounts, so you must switch it on yourself.
- Open rates are unreliable. Litmus found that Apple accounts for 62.26% of more than 1 billion tracked opens, and Apple’s Mail Privacy Protection hides whether people really opened.
- Inbox providers enforce limits. Gmail’s sender guidelines ask every sender to keep the spam complaint rate below 0.3%, and bulk senders must also set up DMARC.
In this guide
- What Most Mailchimp Setup Guides Miss
- How Your Mailchimp Setup Decides What You Pay
- Four Mailchimp Setup Blocks and What Each One Is Built For
- How to Lead With Each Part of Your Mailchimp Setup
- A First-Hour Mailchimp Setup Checklist
- How to Measure Mailchimp Results Without Being Fooled by Opens
- The One Decision Rule: Clean Before You Pay
- Sending Rules Every Mailchimp Beginner Must Follow
- A Real Case: Turning Email Setup Into Paid Work
- Frequently Asked Questions About Mailchimp Setup
- Your Next Step: Practise Mailchimp Setup With Expert Support
What Most Mailchimp Setup Guides Miss
Most beginner guides treat Mailchimp setup as a tour of where to click. They walk through sign-up, the campaign builder and the send button, then stop. That covers the interface, but it skips the part that costs beginners money and reputation later.
The gap is how your Mailchimp setup stores, counts and judges your contacts. Those rules decide your bill, your deliverability and how honest your reports are. So this guide explains the mechanism first, then gives a default move for each building block, a way to measure results and one decision rule.
Some ground rules apply. Mailchimp changes its plans, limits and menus often, so treat every limit here as a snapshot, not a permanent rule.
Where a figure comes from Mailchimp or another vendor, the guide says so, because a company reporting on its own product is not an independent source. Legal points differ by country, so check your local rules too. If email marketing itself is new to you, start with our email marketing basics guide.
How Your Mailchimp Setup Decides What You Pay
Mailchimp is built around an audience, which is simply its name for a contact list. Every contact sits in an audience, and every campaign goes to an audience or part of one. That sounds simple, but the audience is also the unit Mailchimp uses to count what you pay for.
The Audience Is the Unit of Cost
Mailchimp’s help centre recommends that you “maintain 1 primary audience” and use tags, groups or segments to organise contacts. The reason is billing. Audiences do not share contact data, so if the same person sits in two audiences, Mailchimp counts them twice.
Plans also cap how much you can send. Mailchimp’s pricing page lists the Free plan at 250 contacts, 1 audience and a maximum of 500 sends a month or 250 a day. It also says sending will be paused if you exceed those limits. As a result, list structure in your Mailchimp setup is a cost decision, not just a filing choice.
Your Sender Address Decides Who Trusts You
Inbox providers check whether your email really comes from the domain it claims. Mailchimp warns that free email domains, such as Gmail or Yahoo addresses, “often have policies” telling receiving servers to reject mail that fails DMARC. DMARC is a published rule that tells inboxes what to do with mail that fails authentication.
So Mailchimp rewrites a free sender address to one of its own subdomains. That keeps your mail moving, but it weakens your brand. A sender address on your own domain, with authentication set up, is the stronger choice for any business.
Four Mailchimp Setup Blocks and What Each One Is Built For
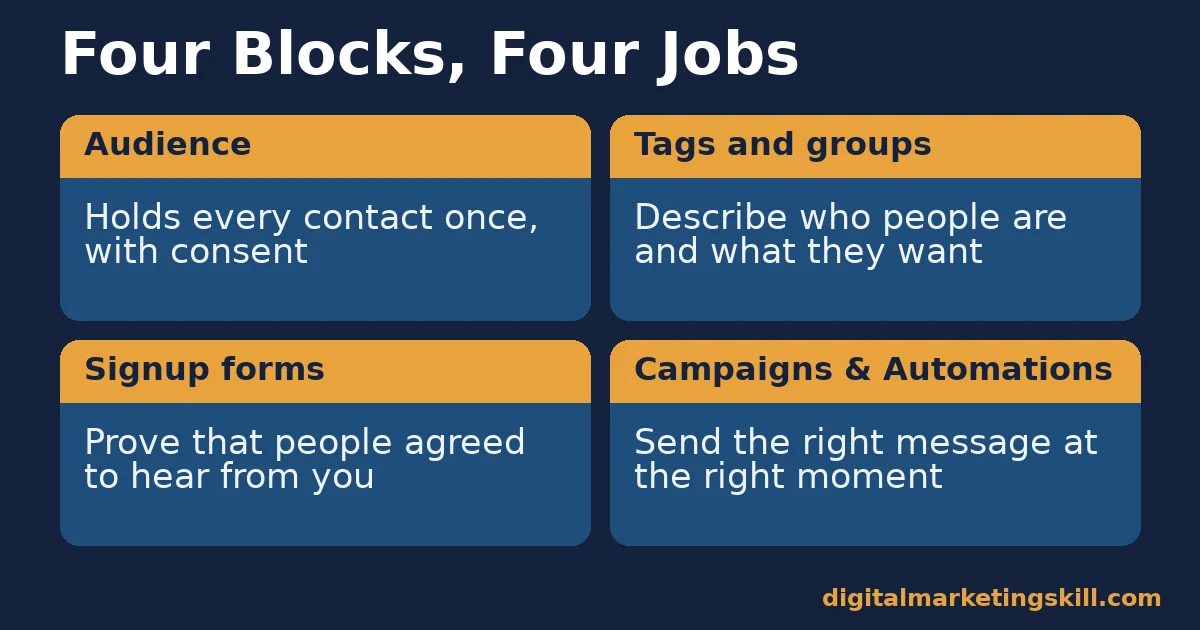
Almost every Mailchimp setup uses the same four building blocks. Each one has a specific job, and most early mistakes come from using one for another’s job.
Audience: Built to Hold Everyone Once
The audience holds every contact, with their consent status and details. Its job is to keep one clean record per person. Once you create a second audience for a new product or event, you split that record, and you start paying for the overlap.
Tags and Groups: Built to Describe People
Tags and groups describe who people are and what they want. According to Mailchimp’s guide to tags, “tags are built for your own, internal audience organization”, so contacts never see them. Groups work the other way, because contacts choose their own groups, such as the topics they want to hear about.
Segments then combine this information to pick who receives a campaign. For example, a segment might select everyone tagged “customer” who chose the “offers” group. In short, tags and groups describe, and segments target.
Signup Forms: Built to Prove Consent
A signup form records who agreed to hear from you and when. Double opt-in adds a confirmation email that each new subscriber must click. Mailchimp’s double opt-in page says this step can help improve open rates, yet it is not switched on by default for most accounts.
Consent matters because it is the base of email law in many countries. It also protects deliverability, because people who confirmed are less likely to mark you as spam.
Campaigns and Automations: Built to Send the Right Message
A campaign is a one-off email, such as a newsletter or an offer. An automation sends emails when something happens, such as a new signup or a purchase. Mailchimp’s Free plan does not include automation flows, so beginners on that plan send campaigns only.
That limit shapes your first upgrade decision. If a welcome email matters to your business, you will need a paid plan sooner than your contact count suggests.
How to Lead With Each Part of Your Mailchimp Setup
Knowing what each block does is half the job. The other half is a sensible default for each part of your Mailchimp setup. These headings mirror the four blocks above, so you can work through them in order.
Audience: Lead With One List and Clean Imports
Create one audience and keep it that way. Then import only people who gave you permission, such as past customers or newsletter signups. Never import a bought or scraped list, because those contacts did not agree to hear from you.
Before each import, remove duplicates and obvious typos in a spreadsheet. Mailchimp’s guide to bounces says hard-bounced addresses are “cleaned from your audience automatically and immediately”. However, a bad import still hurts your sender reputation before that clean-up happens.
Tags and Groups: Lead With Three Tags You Will Use
Start with three tags that match real decisions, such as “customer”, “lead” and “event attendee”. Add one group on your signup form if readers want a choice of topics. More labels feel organised, but unused tags only add clutter.
After that, build one saved segment for your most common send. For instance, a segment of customers who chose the offers group can receive promotions, while everyone else gets your regular newsletter.
Signup Forms: Lead With Double Opt-In and a Clear Promise
Turn on double opt-in in your audience settings before you share any form. Then write one line on the form that says what people will get and how often, such as “one practical tip every week”. A clear promise attracts the right people and reduces later complaints.
Also set your sender address to an email on your own domain. If you do not have one yet, getting a domain is a worthwhile early step for any serious email programme.
Campaigns and Automations: Lead With One Welcome Email
Your first email should welcome new subscribers and deliver the promise from your form. On a paid plan, set it as an automation so it goes out the moment someone joins. On the Free plan, send a short welcome campaign to new contacts each week instead.
Keep the first emails simple. One message, one main link and a plain layout make it easy to see what worked. Our guide to building an email automation strategy covers the sequences to add later.
A First-Hour Mailchimp Setup Checklist
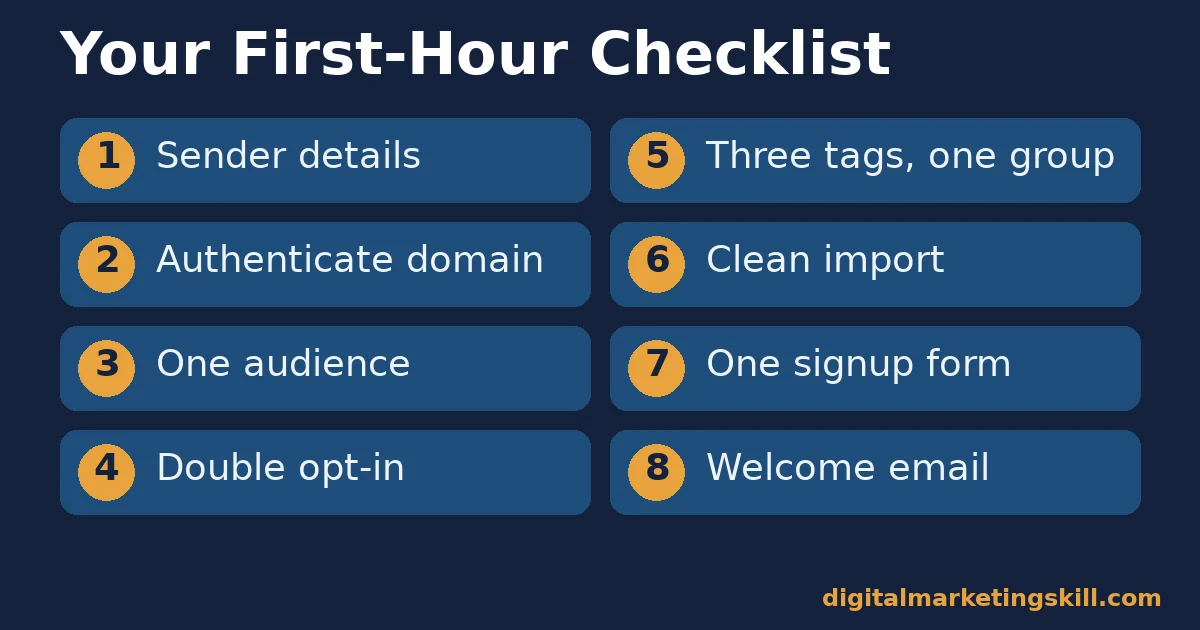
You can complete a solid Mailchimp setup in about an hour if you work in order. Each step below builds on the one before, so resist the urge to design an email first. The email is the easy part once the foundations work.
Foundations: Protect Your Sending Name First
The first four steps decide whether inboxes trust you and how your contacts are counted.
- Fill in your account and sender details. Use your real business name and a sender address on your own domain, because both appear in every email you send.
- Authenticate your domain. Follow Mailchimp’s domain steps to add the DNS records it gives you, so inboxes can confirm the mail really comes from you.
- Set up one audience. Name it after your business, not after a product, because it should outlive any single campaign.
- Turn on double opt-in. Switch it on in the audience settings before anyone joins, since it is easier than tidying up later.
First Contacts: Label, Import and Welcome
The next four steps bring people in and give them a reason to stay.
- Create three tags and one group. Match the tags to decisions you actually make, and let the group capture what readers want.
- Import permission-based contacts. Clean the file first, then tag each import so you know where every contact came from.
- Publish one signup form. Add a one-line promise about what people get and how often, then test it with your own address.
- Send a welcome email. Deliver the promise from your form, include one main link, and check how it looks on a phone.
Run through the same list whenever you inherit someone else’s account. Many messy accounts fail at step three, with several audiences full of duplicates. Fixing that one issue often makes the rest of the Mailchimp setup simpler and cheaper.
How to Measure Mailchimp Results Without Being Fooled by Opens
Mailchimp reports many numbers after each send. For a new Mailchimp setup, five of them matter most, and the open rate is not one of them. Litmus email client data found that Apple accounts for 62.26% of more than 1 billion opens in its analytics. Apple’s Mail Privacy Protection can make those opens look higher than they really are.
- Click rate: the share of recipients who clicked at least one link. This is your best signal of real interest, because a click needs a person to act.
- Unsubscribe rate: the share of recipients who left your list after a send. A spike usually means the content did not match what people signed up for.
- Bounce rate: the share of emails that could not be delivered. Mailchimp turns a soft bounce into a hard bounce after 7 soft bounces for inactive contacts, or up to 15 for active ones.
- Spam complaint rate: the share of recipients who marked your email as spam. Keep it well below the 0.3% ceiling in Gmail’s sender guidelines.
- Conversions per send: sales, bookings or replies that came from the email. Track them with tagged links in your analytics tool, because this is the number that pays for the list.
Benchmarks: Compare With Yourself First
For context, Mailchimp’s own email marketing benchmarks report an average click rate of 2.62% and an unsubscribe rate of 0.22%. Those figures cover Mailchimp customers’ campaigns sent to at least 1,000 subscribers, and they are an older snapshot. So the fairest benchmark for your Mailchimp setup is your own past sends.
The One Decision Rule: Clean Before You Pay
If you remember one thing from this guide, make it this. Before you upgrade your plan or move to a bigger contact tier, remove or re-engage every contact who has not clicked anything in your last ten campaigns. Mailchimp charges by contact, so inactive contacts cost money and drag down your engagement.
This is our own rule of thumb, not a Mailchimp requirement. Ten campaigns gives each contact a fair chance to respond. It also gives you a clear, repeatable test you can run in a few minutes with a segment.
To build that segment, filter your audience by campaign activity and choose contacts who did not click any of your recent campaigns. Save it, then export a copy before you remove anyone. That way, you can restore a contact who asks why they stopped hearing from you.
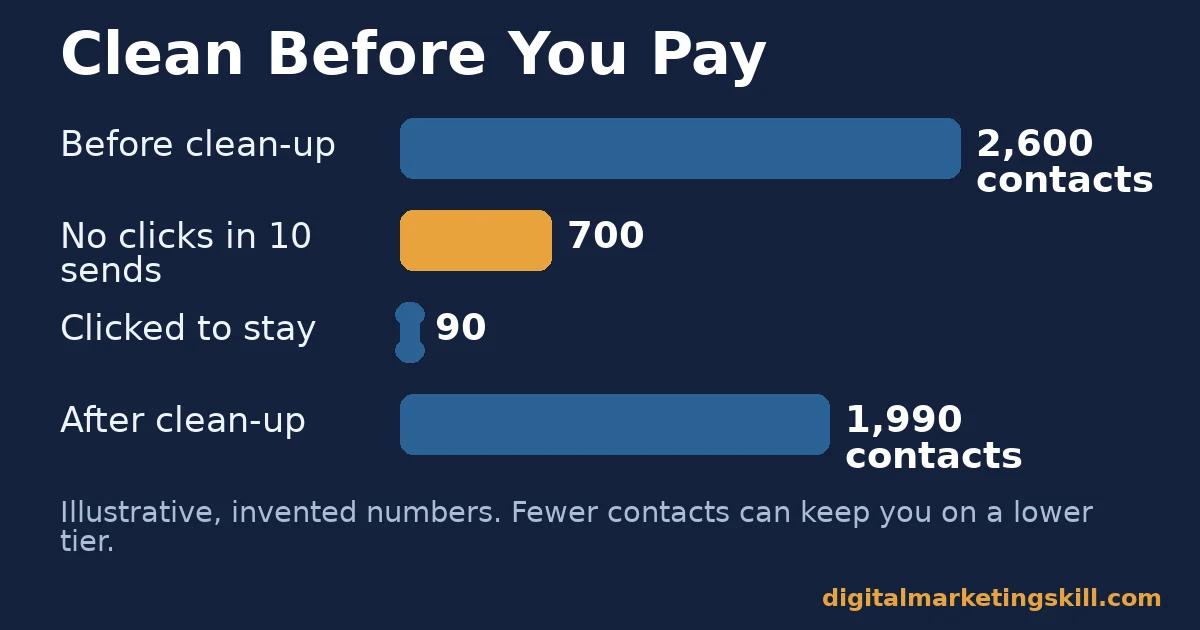
Here is an illustrative example with invented numbers. A small shop has 2,600 contacts and is about to move to a higher tier. A segment shows 700 contacts with no clicks in the last ten campaigns. The shop sends those 700 people one short “do you still want to hear from us?” email.
Afterwards, 90 people click to stay, so the shop keeps them. It then archives or removes the other 610 contacts. The list drops to 1,990, so the shop stays on its current tier, and its click rate rises because the remaining contacts actually read.
Sending Rules Every Mailchimp Beginner Must Follow
Email law and inbox rules apply from your very first send. The details differ by country, so treat these as a starting checklist, not legal advice.
- Include a postal address. The US Federal Trade Commission’s CAN-SPAM compliance guide requires a valid physical postal address in commercial email.
- Honour unsubscribes fast. The same FTC guide gives senders 10 business days to honour an opt-out, with penalties of up to $53,088 per violating email. So never re-add people who left your list.
- Keep complaints low. Gmail’s email sender guidelines ask all senders to keep spam rates below 0.3%. Senders of 5,000 or more messages a day must also set up SPF, DKIM and DMARC and offer one-click unsubscribe.
- Get consent first. Many countries require clear permission before you send marketing email. Double opt-in gives you a record of that permission.
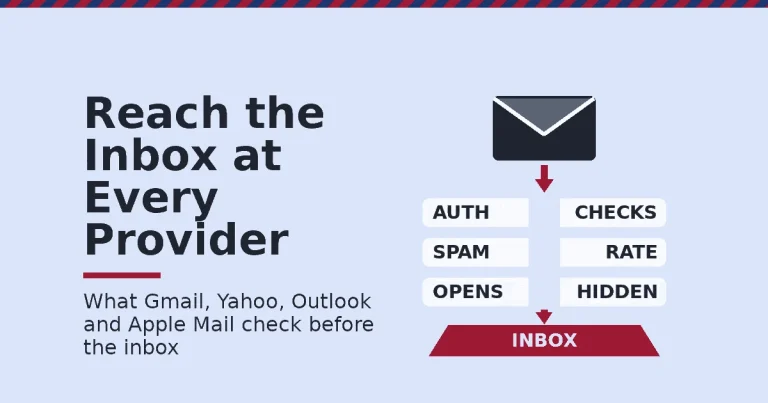
Our guide to email deliverability explains how Gmail, Yahoo, Outlook and Apple check your mail in more depth.
A Real Case: Turning Email Setup Into Paid Work
Email platforms reward people who can set them up properly. Digital Marketing Skill Institute student Olajire Jacob wrote, in a review published on the Institute’s reviews page, that they charged an average of $500 “to set up email marketing flows for clients in the US, UK & Ca”. They added that they later expanded their services and scaled to $5K a month.
This case has limits. It is one self-reported result, and it does not show costs, hours worked or how long the growth took. So read it as an example of demand for email setup skills, not as a typical outcome. Individual results vary, as our earnings disclaimer explains.
Even so, the case shows why the basics in this guide matter. Clients pay for a clean audience, working forms, authenticated sending and automations that run. Those are exactly the skills a first Mailchimp setup should teach you.
Frequently Asked Questions About Mailchimp Setup
Is Mailchimp free to use?
Mailchimp has a Free plan, but it is limited. Its pricing page lists 250 contacts, 500 sends a month or 250 a day, one audience and one user, with no automation flows or email scheduling. Sending pauses if you go over a limit.
How many audiences should I create in Mailchimp?
Create one audience in almost every case. Mailchimp recommends one primary audience organised with tags, groups and segments. Audiences do not share data, so a person in two audiences counts as two contacts on your bill.
Is double opt-in on by default in Mailchimp?
No, double opt-in is off by default for most accounts. You switch it on in your audience settings. Some audiences with a primary contact address in the EU may already use it by default.
Can I use a Gmail address as my sender in Mailchimp?
You can, but it is not ideal. Free email domains often tell receiving servers to reject mail that fails DMARC, so Mailchimp rewrites the sender to one of its own subdomains. An address on your own domain looks more trustworthy and can be authenticated.
Why are my Mailchimp open rates so high?
Apple’s Mail Privacy Protection can register opens that never happened, and Apple accounts for most tracked opens in Litmus data. So treat open rates as a rough signal and judge emails by clicks, unsubscribes and conversions instead.
Can I import contacts I collected elsewhere?
Yes, if those people agreed to receive marketing email from you. Past customers and newsletter signups usually qualify, depending on your local law. Never import bought or scraped lists, because they damage deliverability and break email rules.
Your Next Step: Practise Mailchimp Setup With Expert Support
Start with one audience, three tags, a double opt-in form and one welcome email. Send a few campaigns, judge them by clicks, and clean the list before you pay for more contacts. That routine turns a basic Mailchimp setup into a list worth owning.
If you want guided practice, Digital Marketing Skill Institute teaches email marketing hands-on. The Master Diploma in Digital & AI Marketing includes an AI-Powered Lead Generation and Email Automation track, with courses in lead generation, email marketing and automation, and Google Analytics.
Every track comes with unlimited 1-on-1 coaching and mentoring and real project work for a U.S. partner company. The diploma is dual US and UK accredited and recognised in more than 100 countries. The programme is 100% online, so you can study from anywhere in your country.
You can find more guides on the Digital Marketing Skill Institute blog, including our email marketing checklist. When you are ready, apply for the Master Diploma or start from the Digital Marketing Skill Institute homepage.
Every figure in this guide was checked against its original source before publication. Figures marked as illustrative are invented examples, not real results.
![9 Amazing Digital Marketing Skills to Make Money Online [With Proof]](https://digitalmarketingskill.com/wp-content/uploads/2019/07/9-Amazing-Digital-Marketing-Skills-to-Make-Money-Online-With-Proof-17.png)